How to create a Protected Client Gallery Post
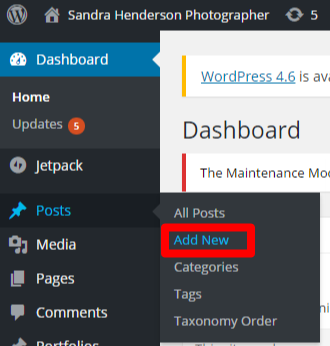
- Navigate to “Posts” => “Add New“
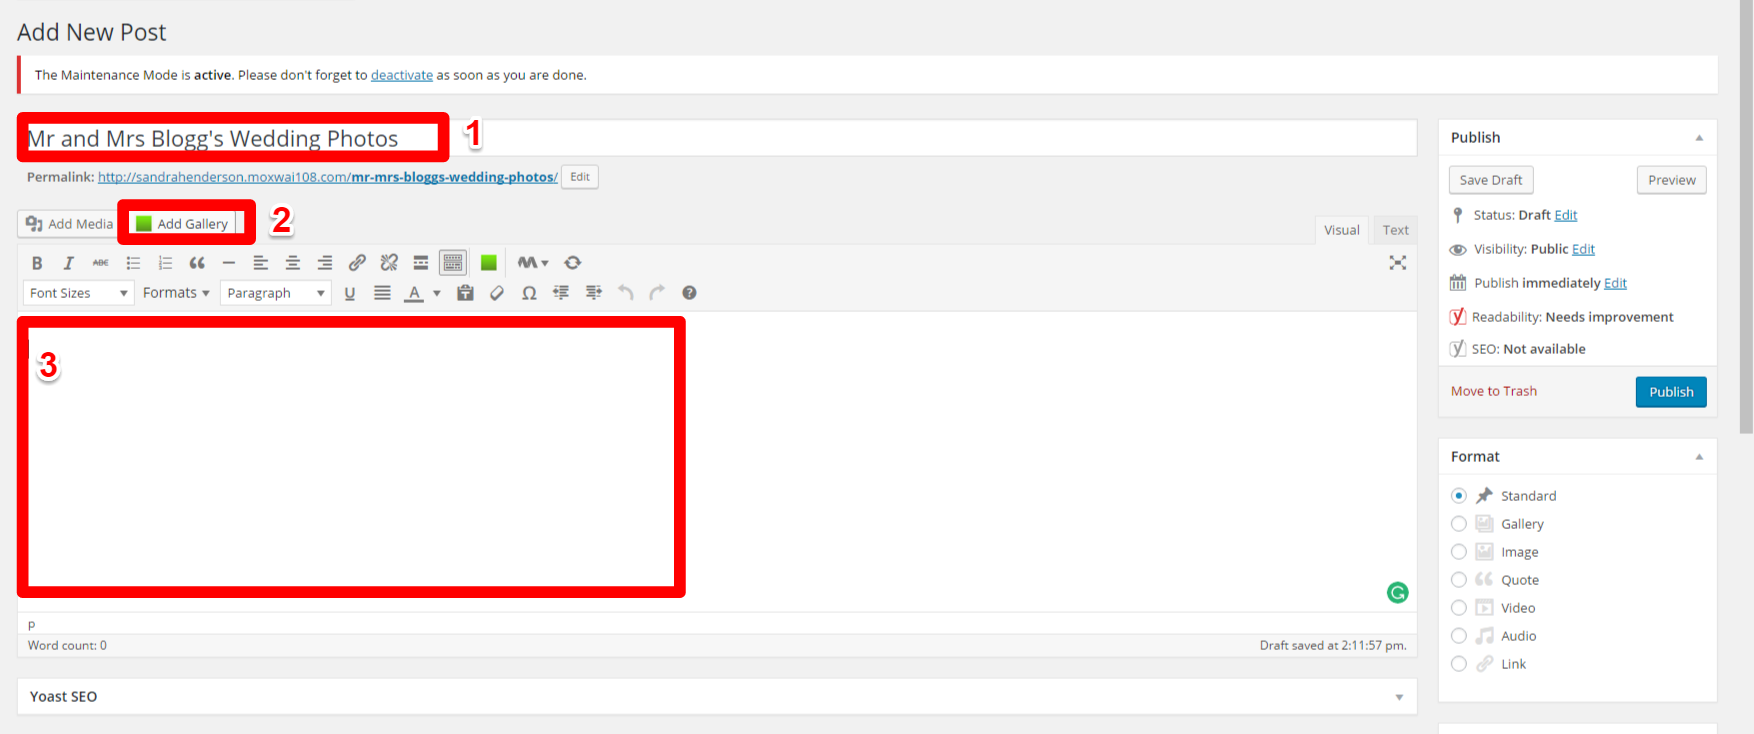
Creating the Post
- Enter the title of the post
- Add a gallery to the post
- Add text to go with the gallery – Note: the file name of the image will appear under the photo for easy referencing
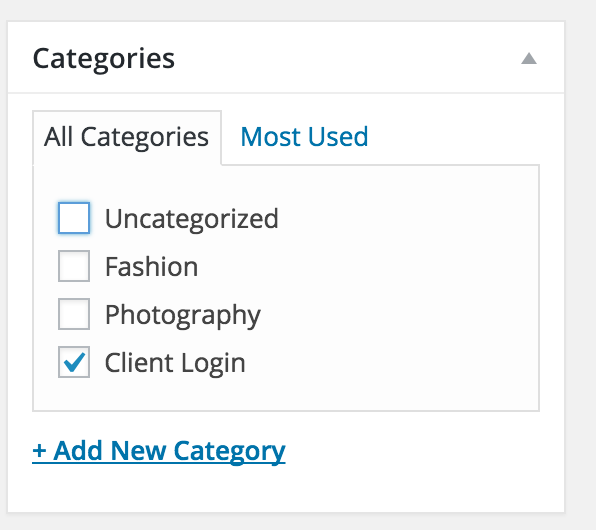
- Tick the category “client login” on the right-hand-side. This will make the post appear on your client login page.
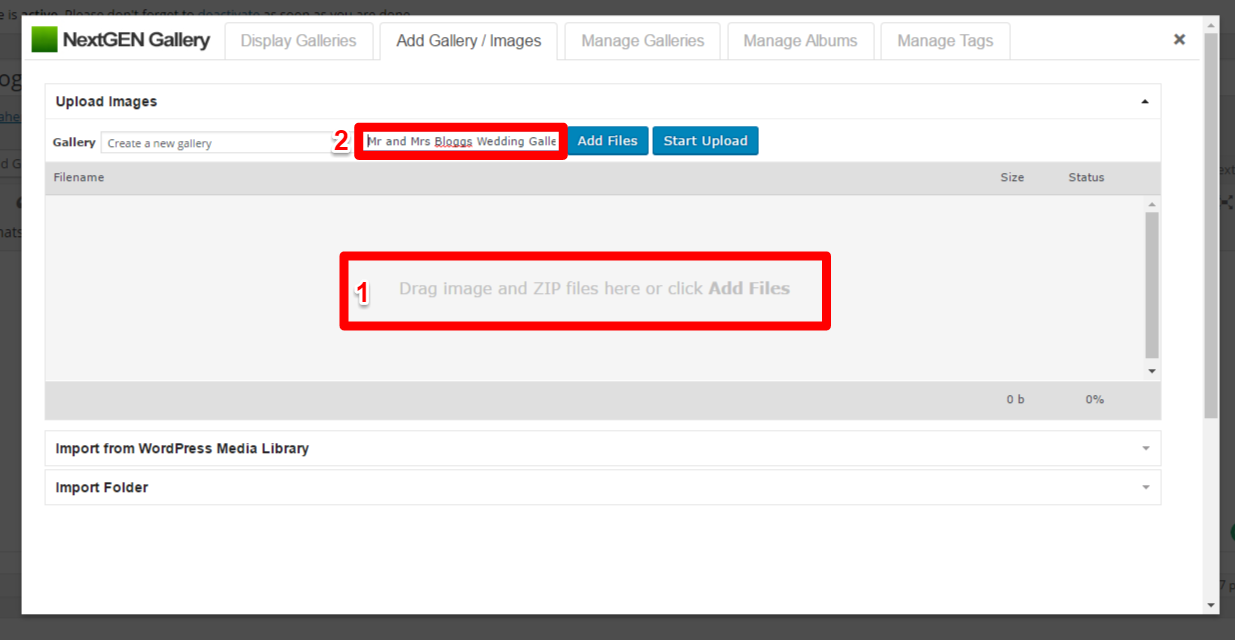
Adding the Gallery
- Drag and drop the images into the droppable area
- Enter the title of the gallery
- Click ‘Start Upload’
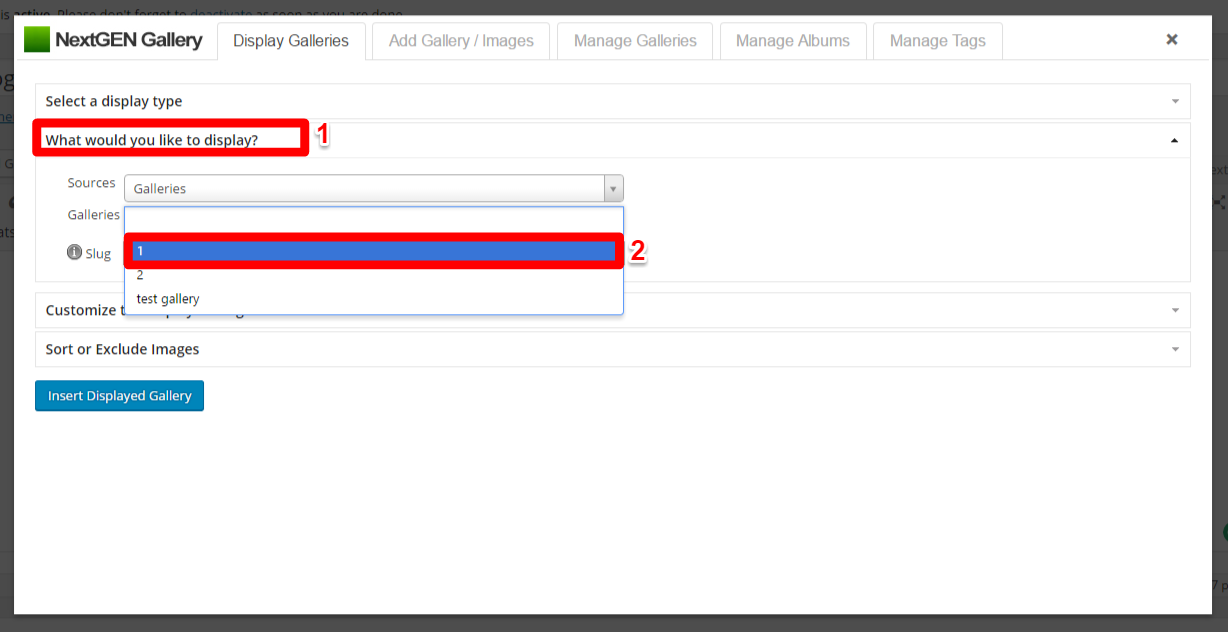
- You should now be back on the Display Galleries tab. Click the “What would you like to display?” section
- Select the gallery you just added – ‘sources’ should be set to Galleries.
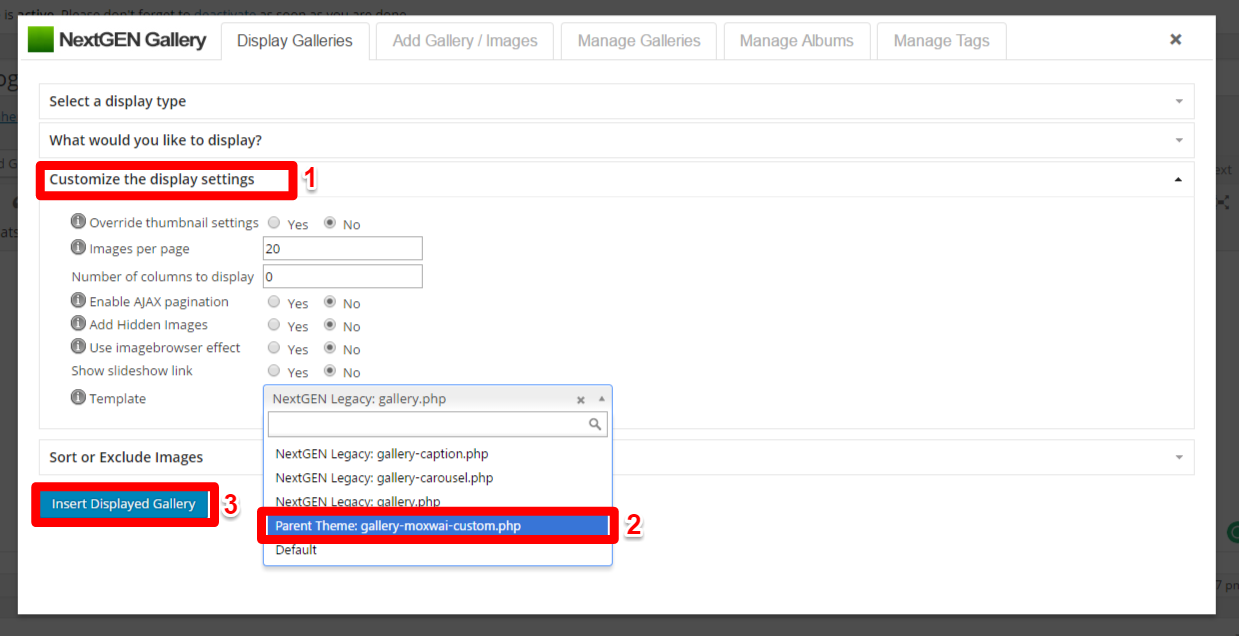
Customize section
- Click the “Customize the display settings” section
- IMPORTANT: Select the “gallery-moxwai-custom” template (This template pulls the file name and adds it as a caption)
- Click the “Insert Displayed Gallery” button
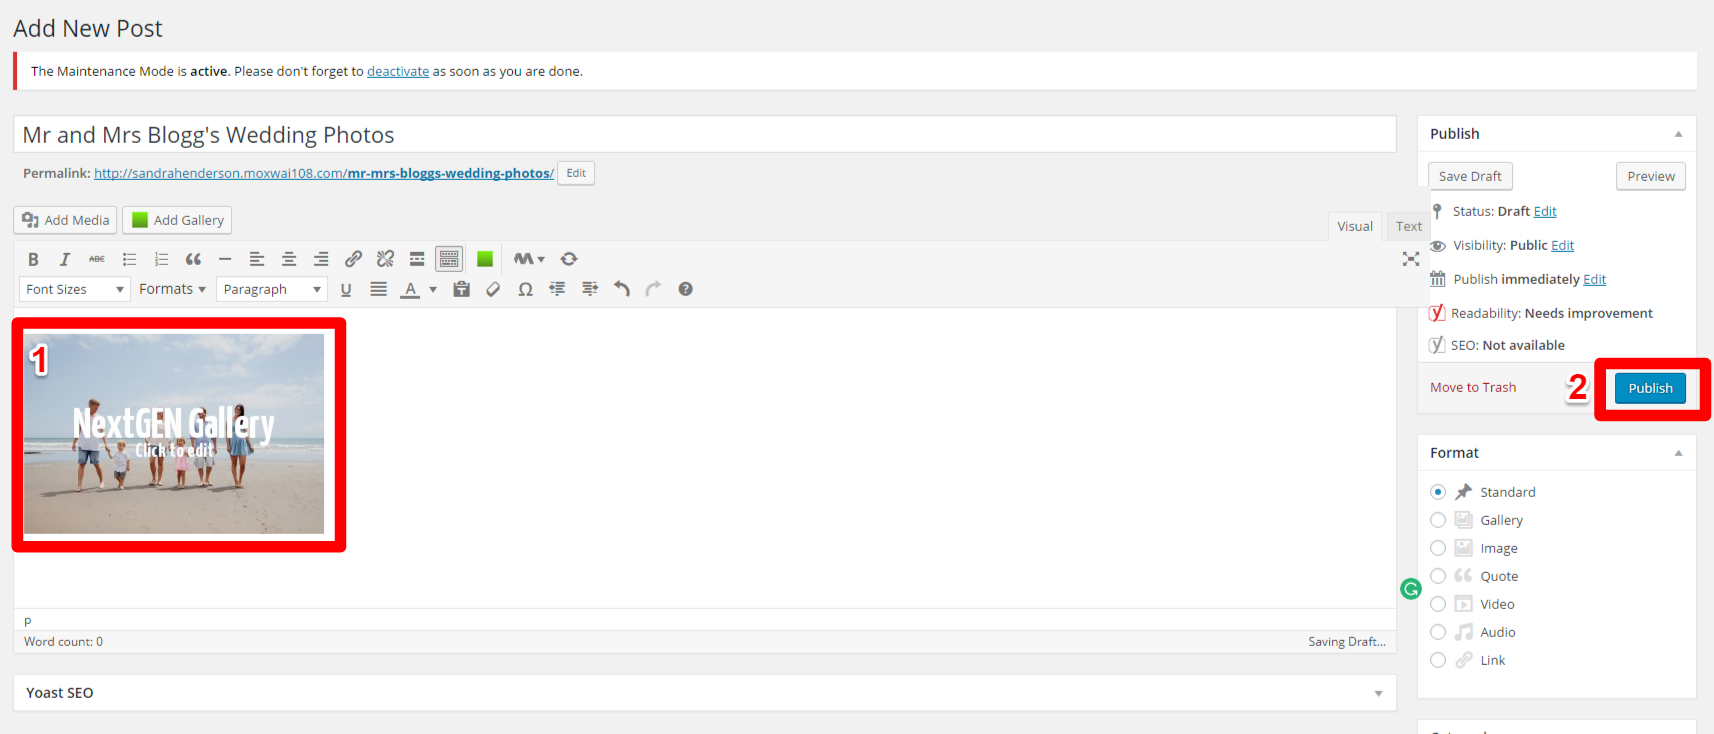
- Your gallery should appear in the content area.
- You can also upload a feature image for the post.
- Preview to test how it looks then publish once your happy. Rember to Protect the post – see below.
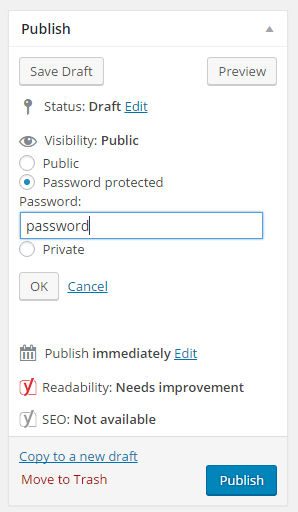
Password Protect your Client Gallery
To protect your gallery post with a password:
- Click ‘Edit’ on the Visibility section (top right of page – under the publish section)
- Select “Password protected”
- Enter your password – include numbers and letters
- Click “OK”
- Click the “Publish” or “Update” if it’s already been published.
- The password can then be passed onto the client along with the link of the post.